The allure of homemade oat milk is undeniable: fresh, additive-free, and perfectly tailored to your taste. Yet, many aspiring home baristas and health enthusiasts encounter a frustrating challenge – the dreaded slimy texture. If your homemade oat milk tends to resemble a science experiment rather than a creamy beverage, you’re not alone. This comprehensive guide will demystify the science behind slimy oat milk and equip you with the precise techniques to achieve velvety smooth, slimy-free results every time, especially when using your trusty nut milk maker.
The Wonderful Benefits of Oat Milk
Oat milk has surged in popularity, becoming a staple in many kitchens due to its creamy texture and versatility. Beyond its delicious taste, oat milk offers a host of benefits that make it an excellent dairy-free alternative. It’s naturally lactose-free, cholesterol-free, and often contains less saturated fat than animal milk. Nutritionally, oats are a good source of soluble fiber, particularly beta-glucan, which is known for its heart-healthy properties and ability to help regulate blood sugar levels. They also provide essential vitamins and minerals like B vitamins, magnesium, and phosphorus. The rise of plant-based diets and increasing awareness of sustainability have further cemented oat milk’s status as a top choice for conscious consumers.
Understanding the Sliminess Challenge
The key to preventing slimy oat milk lies in understanding the humble oat itself. Oats naturally contain beta-glucan, a soluble fiber that becomes gelatinous when exposed to water and heat. This is the very same property that makes oatmeal thick and comforting. However, when making oat milk, this desirable thickening property turns into an unwelcome sliminess if not managed correctly. Over-blending, using warm water, or excessive squeezing during straining can all activate and release too much starch and beta-glucan, resulting in a thick, unpalatable consistency. The goal, therefore, is to extract the milky goodness without over-activating these natural thickeners.
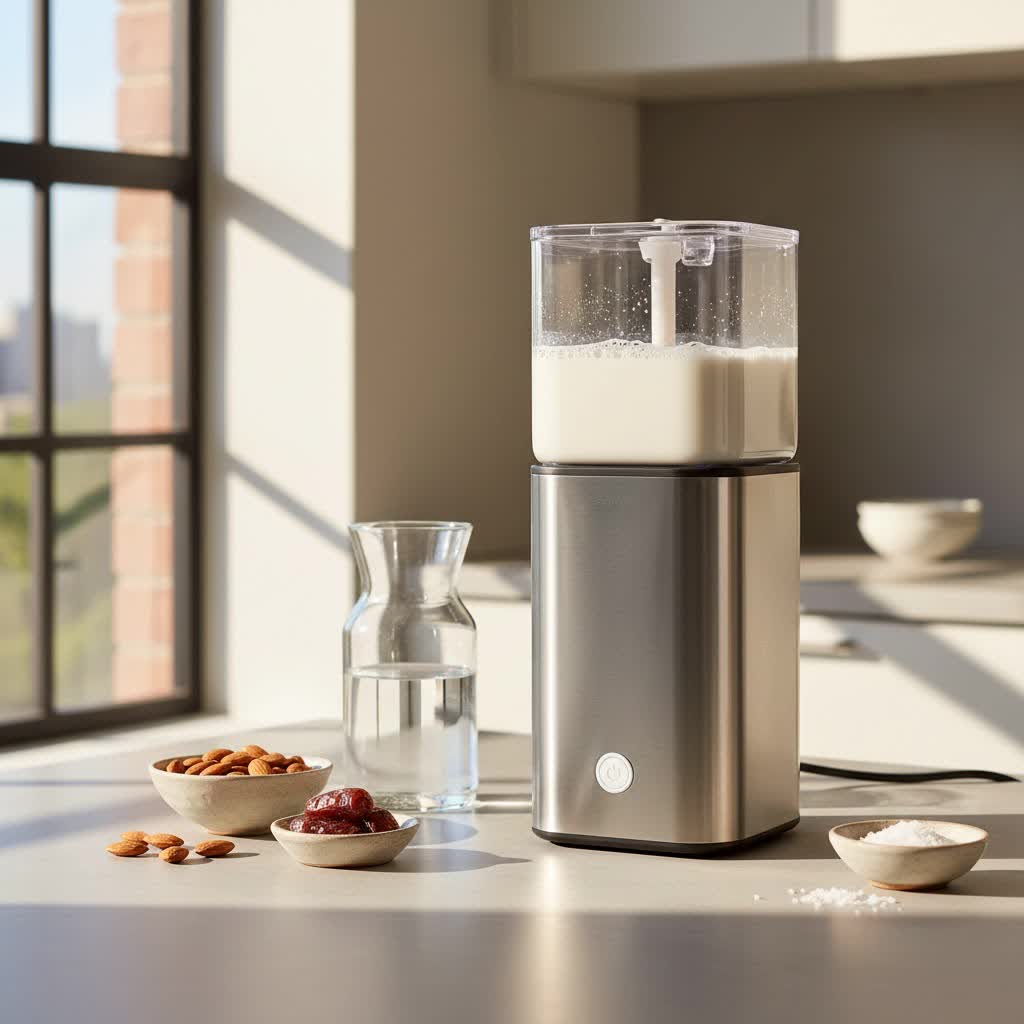
Essential Gear for Slimy-Free Success: Your Nut Milk Maker
A nut milk maker can be an incredible asset in your quest for perfect oat milk, offering convenience and often pre-programmed cycles. These machines simplify the process by blending and, in some cases, heating (though for oat milk, we’ll mostly avoid the heat). The enclosed system means less mess and a more consistent blend. When selecting or using your nut milk maker for oat milk, prioritize models with a “cold blend” or “raw” setting, as minimizing heat is crucial. Look for machines that offer variable blending times or shorter cycles, allowing you precise control over the processing duration. While they streamline the blending, careful attention to the straining process—whether internal or external—remains vital to avoid sliminess.
The Recipe for Perfectly Smooth Oat Milk in Your Nut Milk Maker
Achieving creamy, non-slimy oat milk is simpler than you think with the right approach. Here’s a detailed recipe and method tailored for your nut milk maker:
Ingredients:
- 1 cup (90g) Rolled Oats (old-fashioned oats are best; avoid quick-cooking or instant oats as they are more processed and release more starch)
- 4 cups (960ml) Ice-Cold Water (the colder, the better – you can even add a few ice cubes to the water)
- Optional: 1-2 Medjool dates (pitted), 1/2 teaspoon vanilla extract, a pinch of salt (to enhance flavor)
Equipment:
- Your Nut Milk Maker
- Fine-mesh strainer or high-quality nut milk bag (if your machine doesn’t strain sufficiently)
- Airtight container for storage
Step-by-Step Instructions:
- Prepare the Oats: Briefly rinse your rolled oats under cold water for about 10-15 seconds. This helps remove surface starches that contribute to sliminess. Some methods suggest no soaking, while others recommend a very short, cold soak (no more than 30 minutes in ice water). For best results with a nut milk maker, a quick rinse is usually sufficient. Do not soak for extended periods or in warm water.
- Combine in Nut Milk Maker: Add the rinsed rolled oats and the ice-cold water to your nut milk maker. If using, add optional sweeteners like dates, vanilla extract, and a pinch of salt at this stage.
- Blend with Precision: This is the most critical step.
- If your nut milk maker has a “cold” or “raw milk” setting, select it.
- If you have manual control, blend for a maximum of 30-45 seconds. Shorter is often better. Over-blending generates heat from the friction of the blades and breaks down the oats too much, releasing excess starch and beta-glucan, leading to a slimy texture. Pulsing can be beneficial to ensure thorough blending without overheating.
- Strain Gently: The way you strain dramatically impacts the final texture.
- If your nut milk maker has a built-in strainer, use it.
- If you need additional straining (or if your machine doesn’t strain), place a fine-mesh strainer or a high-quality nut milk bag over a large bowl. Carefully pour the blended oat mixture through it.
- Do NOT squeeze the pulp. Let the liquid drip through naturally. Squeezing forces more of the slimy beta-glucans and fine oat particles into your milk. You will be left with some oat pulp in the bag or strainer, which is normal.
- Chill and Store: Transfer your freshly made oat milk into an airtight container. Refrigerate immediately. Homemade oat milk will separate in the fridge, so shake it well before each use. It typically stays fresh for 4-5 days.
Troubleshooting Common Oat Milk Mistakes
Even with the best intentions, things can sometimes go awry. Here’s how to troubleshoot common issues:
- Over-blending: If your nut milk maker has a longer default cycle, manually stop it after 30-45 seconds. Remember, quick pulses are your friend.
- Warm Water: Always use water straight from the fridge, or even add a few ice cubes to ensure it stays ice-cold throughout the blending process. Heat is the enemy of non-slimy oat milk.
- Squeezing the Pulp: Resist the urge to wring out every last drop from the nut milk bag. Any remaining liquid in the pulp is not worth the resulting sliminess. Let gravity do the work.
- Incorrect Oat Type: If you’ve been using quick-cooking or instant oats, switch to old-fashioned rolled oats. They are less processed and have a lower tendency to become slimy.
- Too Much Oat-to-Water Ratio: While a higher oat ratio can make creamier milk, it also increases the risk of sliminess. Stick to the 1 cup oats to 4 cups water ratio initially, then adjust slightly as you gain experience.
Top Tips for the Creamiest, Non-Slimy Oat Milk
Beyond the core recipe, a few extra tips can elevate your homemade oat milk to perfection:
- Temperature Control is Paramount: Continuously emphasize ice-cold water. Some experts even recommend chilling your nut milk maker’s pitcher beforehand.
- Quality of Oats Matters: Opt for organic, gluten-free rolled oats if desired. Better quality oats often yield better results.
- Patience During Straining: This cannot be stressed enough. Let the milk drip naturally, perhaps double-straining through a very fine mesh for extra smoothness without force.
- Consider a Pinch of Fat: For an even richer, store-bought-like creaminess without sliminess, a tiny amount of neutral-flavored oil (like sunflower oil) or a small dollop of cashew butter can be added during blending. This emulsifies with the milk, improving texture.
- Don’t Over-Soak: As mentioned, avoid soaking your oats for long periods. If you choose to soak, keep it short and in ice-cold water.
Buying Guide: Choosing the Right Nut Milk Maker
When investing in a nut milk maker, consider features that will best support your quest for slimy-free oat milk:
- Cold Blending Function: This is critical. Many machines offer a “raw” or “cold” setting that prevents heating the ingredients, directly combating starch activation.
- Variable Speed and Time Settings: The ability to customize blending duration is invaluable. Shorter blend times are crucial for oats.
- Efficient Straining System: Some advanced nut milk makers have integrated straining mechanisms. Look for those that promise efficient separation without requiring manual squeezing.
- Ease of Cleaning: Oat residue can be sticky. A machine that is easy to disassemble and clean will make your life much simpler.
- Capacity: Choose a size that suits your household’s consumption needs to ensure you always have fresh oat milk.
Usage and Storage of Your Perfect Oat Milk
Once you’ve mastered the art of slimy-free oat milk, the culinary possibilities are endless!
- Versatile Applications: Enjoy it in your morning coffee or tea, blend it into smoothies, pour it over cereal or granola, or use it in baking recipes.
- Heat Sensitivity: Be aware that homemade oat milk can thicken significantly when heated directly, similar to making oatmeal. If you plan to use it in hot beverages, gently warm it rather than boiling vigorously. This thickening is due to the same beta-glucans, but when controlled, it’s not the same as the undesirable sliminess.
- Natural Separation: It’s completely normal for homemade oat milk to separate into layers in the refrigerator. Simply give it a good shake before serving to recombine the ingredients.
- Storage Duration: For optimal freshness and taste, consume your homemade oat milk within 4-5 days. Always store it in an airtight container in the coldest part of your refrigerator.
Conclusion
Creating perfectly creamy, slimy-free oat milk in your nut milk maker is an achievable culinary triumph. By adhering to a few fundamental principles—using ice-cold water, avoiding over-blending, straining gently, and selecting the right type of oats—you can consistently produce a delicious, wholesome plant-based milk that rivals store-bought brands. Your nut milk maker, combined with these expert techniques, transforms what can be a frustrating process into a simple, rewarding experience. Embrace these tips, experiment with flavors, and enjoy the delightful world of homemade oat milk.
Have you discovered any unique tips for making your oat milk perfectly smooth and creamy?
Frequently Asked Questions
Why does my homemade oat milk turn slimy even with a nut milk maker?
|
Our Picks for the Best Nut milk maker in 2026
As an Amazon Associate I earn from qualifying purchases.
|
||
| Num | Product | Action |
|---|---|---|
| 1 | 50.73oz Nut Milk Maker Machine: 12-in-1 Automatic Soy Milk Maker with Detachable Design, Homemade Juice,Almond,Oat Milks for Plant-Based Milks, 24H Delay Start/Keep Warm/Auto-Clean/Safety Lock |

|
| 2 | 8-in-1 Automatic Nut Milk Maker Blender, 40.6oz Homemade Almond, Oat, Coconut, Soy, Plant-Based & Non-Dairy Milks, Soybean Machine with Delay Start, Keep Warm, Self-Cleaning & Boil Water Functions |
|
| 3 | Nut Milk Maker, AlfaBot N2 Automatic Almond Milk Machine for Homemade Plant-Based Milk, Oat, Soy, Yogurt, 5 Modes/35OZ Big Capacity Soy Milk Maker with Delay Setting and Self Cleaning (Cream) |
|
| 4 | 35oz Nut Milk Maker, Compact Soy Milk Maker with 12 Blades, Automatic Almond Oat Milk Machine, Hot & Cold Functions,12H Timer, Auto Clean, Keep Warm, White Batch Plant-Based Milk Maker |
|
| 5 | 8-IN-1 IAGREEA Nut Milk Maker Machine, 35 oz Soy Milk Maker, Oat, Soy, Plant Based and Dairy Free Beverages, Juice, 2H Keep Warm Countertop Blender, 10 Blades, 12H Delay Start, BPA-Free, Self-Cleaning |
|
| 6 | EanOruus Juicer Machines, 3-in-1 Cold Press Juicer with 6.5" Extra Large Chute, 100oz Large Capacity, AC Motor, Makes Juice, Nut Milk & Sorbet, Premium Gray |
|
| 7 | KIDISLE 32oz Automatic Soy Machine for Homemade Almond, Oat, Coconut, Soy, Plant Based Milks and Non Dairy Beverages with Delay Start/Keep Warm/Self-Cleaning/Boil Water, Black |
|
| 8 | ChefWave Milkmade Soy Milk Maker – 6-in-1 Plant-Based Milk Machine for Almond, Oat, Soy, Cashew, Coconut & Macadamia – No Soaking, Auto-Clean, Delay Start, Glass Pitcher – White |
|
| 9 | Nut Milk Maker, 40 Oz 8 in 1 Homemade Automatic Plant-Based Milk, Soy Milk, Oat Milk, Almond Milk & More Multifunctional/12 Hours Timer/Auto-Clean/Room Temp/Keep Warm/Boil/Room Temp/Low-Noise |
|
| 10 | Automatic Nut Milk Maker, 35 oz(1000ml) Homemade Almond, Oat, Soy, Plant-Based Milk and Dairy Free Beverages, Almond Milk Maker with Delay Start/Keep Warm/Boil Water, Soy Milk Maker with Nut Milk Bag |
|
Homemade oat milk often turns slimy because the oats’ natural starches and soluble fibers (beta-glucans) are over-activated by heat or excessive blending and squeezing. Nut milk makers can sometimes generate heat during long cycles, or users may over-process the oats, leading to this undesirable texture.
What kind of oats should I use for non-slimy oat milk in a machine?
For the best non-slimy results, always use old-fashioned rolled oats. Quick-cooking or instant oats are more processed and break down too easily, releasing more starch and leading to a slimier consistency. Steel-cut oats are generally too hard for most nut milk makers and require different preparation.
Is it necessary to soak oats before making milk in a nut milk maker?
No, prolonged soaking is generally not recommended for oat milk, as it can contribute to a slimy texture by activating the starches. A quick 10-15 second rinse under cold water is sufficient to remove surface starches, or a very brief soak (under 30 minutes) in ice-cold water may be acceptable if desired.
How long should I blend oats in my nut milk maker to avoid sliminess?
Blend for a maximum of 30-45 seconds. Shorter is often better. Over-blending generates heat and breaks down the oats too much, causing sliminess. If your machine has preset cycles, choose the shortest, coldest option or manually stop it.
Can I squeeze the pulp in the nut milk bag after blending in my machine?
No, it’s crucial not to squeeze the oat pulp when straining. Squeezing forces more of the starchy and fibrous compounds into your milk, resulting in a slimy texture. Allow the milk to drip through a fine-mesh strainer or nut milk bag naturally and gently.