Imagine a rich, creamy, and decadently chocolatey drink that not only tantalizes your taste buds but also nourishes your body without any artificial additives. This isn’t a fantasy from your favorite café; it’s the luxurious reality of homemade chocolate hazelnut milk, a dairy-free delight you can easily create right in your own kitchen. Whether you’re a seasoned plant-based enthusiast or new to the world of DIY nut milk, mastering this recipe will transform your morning coffee, smoothies, or simple sips into an extraordinary experience. Get ready to unlock the secrets to crafting chocolate hazelnut milk like a true professional.
The Wonderful Benefits of Plant-Based Milk
|
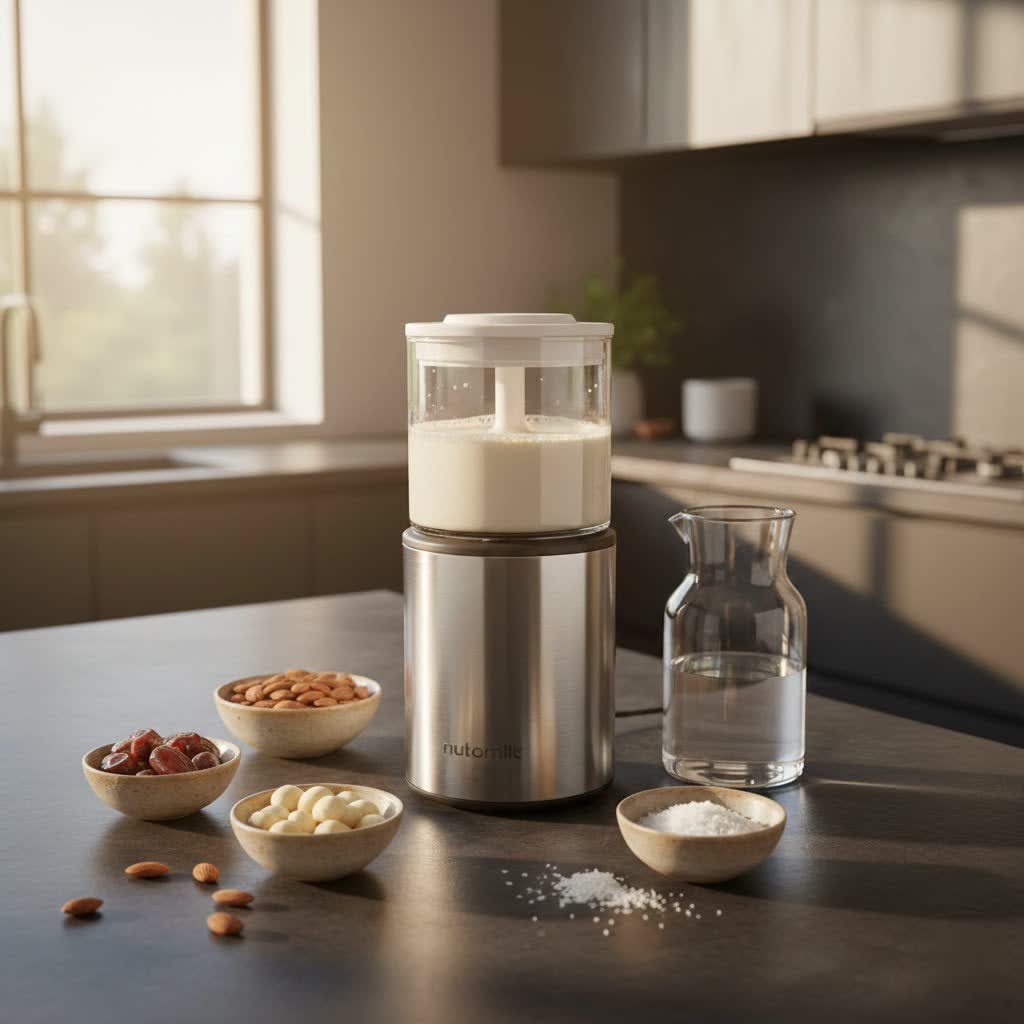
Our Picks for the Best Nut milk maker in 2026
As an Amazon Associate I earn from qualifying purchases.
|
||
| Num | Product | Action |
|---|---|---|
| 1 | 8-IN-1 IAGREEA Nut Milk Maker Machine, 35 oz Soy Milk Maker, Oat, Soy, Plant Based and Dairy Free Beverages, Juice, 2H Keep Warm Countertop Blender, 10 Blades, 12H Delay Start, BPA-Free, Self-Cleaning |

|
| 2 | Automatic Nut Milk Maker, 35 oz(1000ml) Homemade Almond, Oat, Soy, Plant-Based Milk and Dairy Free Beverages, Almond Milk Maker with Delay Start/Keep Warm/Boil Water, Soy Milk Maker with Nut Milk Bag |
|
| 3 | KIDISLE 32oz Automatic Soy Machine for Homemade Almond, Oat, Coconut, Soy, Plant Based Milks and Non Dairy Beverages with Delay Start/Keep Warm/Self-Cleaning/Boil Water, Black |
|
| 4 | 8-in-1 Automatic Nut Milk Maker Blender, 40.6oz Homemade Almond, Oat, Coconut, Soy, Plant-Based & Non-Dairy Milks, Soybean Machine with Delay Start, Keep Warm, Self-Cleaning & Boil Water Functions |
|
| 5 | 50.73oz Nut Milk Maker Machine: 12-in-1 Automatic Soy Milk Maker with Detachable Design, Homemade Juice,Almond,Oat Milks for Plant-Based Milks, 24H Delay Start/Keep Warm/Auto-Clean/Safety Lock |
|
| 6 | Nut Milk Maker, 40 Oz 8 in 1 Homemade Automatic Plant-Based Milk, Soy Milk, Oat Milk, Almond Milk & More Multifunctional/12 Hours Timer/Auto-Clean/Room Temp/Keep Warm/Boil/Room Temp/Low-Noise |
|
| 7 | Nut Milk Maker, AlfaBot N2 Automatic Almond Milk Machine for Homemade Plant-Based Milk, Oat, Soy, Yogurt, 5 Modes/35OZ Big Capacity Soy Milk Maker with Delay Setting and Self Cleaning (Cream) |
|
| 8 | ChefWave Milkmade Soy Milk Maker – 6-in-1 Plant-Based Milk Machine for Almond, Oat, Soy, Cashew, Coconut & Macadamia – No Soaking, Auto-Clean, Delay Start, Glass Pitcher – White |
|
| 9 | EanOruus Juicer Machines, 3-in-1 Cold Press Juicer with 6.5" Extra Large Chute, 100oz Large Capacity, AC Motor, Makes Juice, Nut Milk & Sorbet, Premium Gray |
|
| 10 | 35oz Nut Milk Maker, Compact Soy Milk Maker with 12 Blades, Automatic Almond Oat Milk Machine, Hot & Cold Functions,12H Timer, Auto Clean, Keep Warm, White Batch Plant-Based Milk Maker |
|
Plant-based milks have seen a surge in popularity, and for good reason. They offer a fantastic alternative for those with dairy sensitivities, dietary preferences, or simply a desire to explore new flavors and nutritional profiles. Compared to animal milk, nut milks often contain fewer calories and saturated fats, while being naturally cholesterol-free. Hazelnuts, in particular, are nutritional powerhouses, packed with healthy fats, protein, fiber, and essential minerals like magnesium, copper, and Vitamin E, contributing to heart health and antioxidant protection. Opting for homemade versions ensures you control the ingredients, avoiding unwanted sugars, gums, and preservatives found in many store-bought varieties.
Understanding Nut Milk Makers and Blenders
Creating homemade nut milk primarily involves blending nuts with water and then straining the mixture. For many, a high-speed blender is the workhorse of choice. These powerful appliances effortlessly pulverize nuts into a fine consistency, yielding smooth and creamy milk.
- High-Speed Blenders:
- Pros: Versatile for many kitchen tasks (smoothies, soups, sauces), excellent for achieving very fine consistency, widely available.
- Cons: Can be noisy, requires manual straining with a nut milk bag or cheesecloth.
- Dedicated Nut Milk Makers:
- Pros: Designed specifically for the task, often include built-in heating elements for warm milk or specific programs for different nuts, some offer auto-straining or cleaning functions.
- Cons: Less versatile, can be a significant investment, may still require some manual straining or pulp removal depending on the model.
While a high-speed blender is perfectly sufficient for achieving professional results, a dedicated nut milk maker can streamline the process for frequent users, offering convenience and consistent outcomes.
Crafting Your Own Chocolate Hazelnut Milk: A Step-by-Step Guide
This recipe will guide you through making a deliciously creamy and rich chocolate hazelnut milk, with options for customization.
Ingredients:
- 1 cup (about 140g) raw hazelnuts
- 3-4 cups filtered water (adjust for desired creaminess)
- 2-3 tablespoons unsweetened cacao powder or cocoa powder (adjust to taste)
- 2-4 pitted Medjool dates, or 2-4 tablespoons maple syrup/agave (adjust for sweetness)
- 1/2 teaspoon vanilla extract (optional, for depth of flavor)
- Pinch of sea salt (optional, enhances chocolate flavor)
Equipment Needed:
- High-speed blender or nut milk maker
- Nut milk bag, fine-mesh strainer, or cheesecloth
- Large bowl or pitcher for straining
- Airtight container or glass jar for storage
Detailed Instructions:
- Soak the Hazelnuts (The Foundation of Creaminess): Place the raw hazelnuts in a bowl and cover them generously with filtered water. Let them soak for at least 4 hours, or preferably overnight (8-12 hours) at room temperature. Soaking softens the nuts, making them easier to blend into a smooth, creamy milk and enhancing nutrient absorption. If you’re short on time, you can quick-soak them by boiling them in water for 10-15 minutes, then draining and rinsing.
- Optional: Skin the Hazelnuts (For Smoother Texture): After soaking, drain and rinse the hazelnuts. While not strictly necessary, removing the skins can result in an even smoother, less astringent milk. You can do this by rubbing the blanched hazelnuts vigorously in a clean kitchen towel. Don’t worry if a few skins remain; it won’t significantly impact the final product.
- Blend to Perfection: Transfer the soaked and rinsed hazelnuts to your high-speed blender or nut milk maker. Add 3 cups of fresh filtered water, cacao/cocoa powder, pitted dates (or maple syrup/agave), vanilla extract (if using), and a pinch of salt (if using).
- If using a high-speed blender: Blend on high speed for 1-2 minutes until the mixture is completely smooth and creamy. The longer you blend, the creamier your milk will be.
- If using a nut milk maker: Select the appropriate setting for nut milk and follow your machine’s instructions.
- Strain for Silky Smoothness: Place your nut milk bag over a large bowl or pitcher. Slowly pour the blended mixture into the nut milk bag. Gather the top of the bag and gently squeeze firmly to extract all the liquid. Continue squeezing until no more milk comes out. For an extra-smooth result, you can strain it a second time through the same bag or a fine-mesh strainer lined with cheesecloth. Discard the leftover hazelnut pulp (or save it for baking or adding to smoothies!).
- Taste and Adjust: Taste your freshly made chocolate hazelnut milk. At this stage, you can adjust the sweetness by adding more dates (blend again) or liquid sweetener, or increase the chocolate flavor with a touch more cacao powder.
- Chill and Enjoy: Pour your homemade chocolate hazelnut milk into an airtight glass jar or container. Refrigerate for at least 1-2 hours to chill before serving. This allows the flavors to meld and the milk to reach its optimal refreshing temperature.
Pro Tips for Perfect Chocolate Hazelnut Milk
- Quality Ingredients Matter: Use high-quality raw hazelnuts and pure cacao powder for the best flavor. Dates provide natural sweetness and a subtle caramel note, while maple syrup offers a cleaner, more straightforward sweetness.
- Don’t Skip Soaking: Soaking is crucial. It not only softens the nuts for better blending but also helps break down enzyme inhibitors, making the milk more digestible and smoother.
- Balance is Key: A pinch of salt enhances the chocolate flavor, much like in baking. Vanilla extract adds a layer of sophisticated warmth. Don’t be afraid to experiment with other spices like a tiny dash of cinnamon or a hint of cayenne for a Mexican hot chocolate twist.
- Dealing with Pulp: The leftover hazelnut pulp is edible! You can dry it and use it in granola, energy balls, or add it to baked goods for extra fiber and flavor.
- Achieve Maximum Creaminess: For an extra rich milk, use slightly less water (e.g., 2.5 cups) or add a tablespoon of cashew butter or coconut cream to the blender.
Storage and Shelf Life
Homemade chocolate hazelnut milk, free from preservatives, has a shorter shelf life than store-bought varieties. Store it in an airtight container in the refrigerator for up to 3-5 days. It’s normal for the milk to separate slightly over time; simply shake well before serving.
Beyond the Glass: Creative Uses for Your Homemade Milk
While undeniably delicious on its own, your homemade chocolate hazelnut milk is incredibly versatile:
- Coffee & Lattes: Use it as a luxurious creamer in your morning coffee or whip up a delightful chocolate hazelnut latte.
- Smoothies: Add it to your favorite smoothie recipe for an extra boost of flavor and nutrition.
- Cereal & Oatmeal: Pour it over granola, cereal, or warm oatmeal for a decadent breakfast.
- Desserts: Incorporate it into dairy-free puddings, chia seed parfaits, or even as a base for homemade ice cream.
- Hot Chocolate: Gently warm it on the stovetop for a comforting and rich hot chocolate.
Buying Guide: Choosing the Right Equipment
For those looking to invest in equipment, consider these factors:
- Blender Power: A motor of 1000 watts or higher is ideal for efficiently processing nuts into fine milk.
- Nut Milk Bag Quality: Look for durable, fine-mesh bags that are easy to clean and reusable.
- Nut Milk Maker Features: If considering a dedicated machine, evaluate features like capacity, pre-set programs (for hot/cold milk, different nut types), ease of cleaning, and noise level. Brands like Philips, Unie, or specialized appliance companies often offer reliable options, with prices varying based on features and capacity. Prioritize a model that aligns with your frequency of use and desired convenience.
“Making your own nut milk isn’t just about saving money; it’s about connecting with your food and customizing flavors to your exact preference. The difference in taste and freshness is truly unparalleled.” – Admin, Reviewyb.com
In conclusion, crafting your own chocolate hazelnut milk is a rewarding experience that offers a superior taste and healthier alternative to store-bought options. With a few simple ingredients and the right technique, you can consistently produce a luscious, dairy-free milk that rivals any gourmet beverage. Experiment with the sweetness and chocolate intensity to find your perfect blend, and enjoy the satisfaction of knowing exactly what goes into every wholesome sip. What delicious creation will you make with your homemade chocolate hazelnut milk next?
Frequently Asked Questions
Can I make chocolate hazelnut milk without a nut milk bag?
Yes, you can use several layers of clean cheesecloth draped over a fine-mesh strainer. While a nut milk bag is often more efficient for squeezing, cheesecloth works effectively for straining out the pulp.
How can I make my chocolate hazelnut milk thicker?
To achieve a thicker consistency, reduce the amount of water you add during blending (e.g., use 2.5 cups instead of 3-4). You can also add a tablespoon of soaked cashews or coconut cream for extra richness and body.
What can I do with leftover hazelnut pulp?
Leftover hazelnut pulp is versatile! You can spread it thinly on a baking sheet and dehydrate it in a low oven to create a hazelnut flour substitute, add it to oatmeal or smoothies for extra fiber, or incorporate it into energy balls, cookies, or other baked goods.
Why did my homemade nut milk separate?
Separation is completely normal for homemade nut milks because they lack emulsifiers found in commercial products. Simply shake your jar or container well before each use to reincorporate the fats and water.
Can I roast the hazelnuts before making milk?
Yes, roasting hazelnuts before soaking can add a deeper, toastier flavor to your milk, similar to Nutella. Be sure to cool them completely before soaking to prevent premature cooking of the nuts.
How long does homemade chocolate hazelnut milk last?
Typically, homemade chocolate hazelnut milk will last for 3 to 5 days when stored in an airtight container in the refrigerator. Always check for any off smells or tastes before consuming.